Configure the labeling interface
The labeling interface determines what users see when labeling a task.
Before you can configure the labeling interface, you should do the following:
- Create a project. The labeling interface is part of a project’s settings.
- Optional - Import data. You do not have to import data before configuring labeling for your project. However, if your labeling interface is going to reference certain fields within your data (for example, columns within a CSV), it might be easier to import that data first.
Configure the labeling interface
Configure the labels and task type for annotators using the templates included with Label Studio or by defining your own combination of tags to set up the labeling interface for your project.
- From a project, go to Settings > Labeling interface.
- Select a template from the available templates or customize one.
- Label Studio automatically selects the field to label based on your data. If needed, modify the selected field.
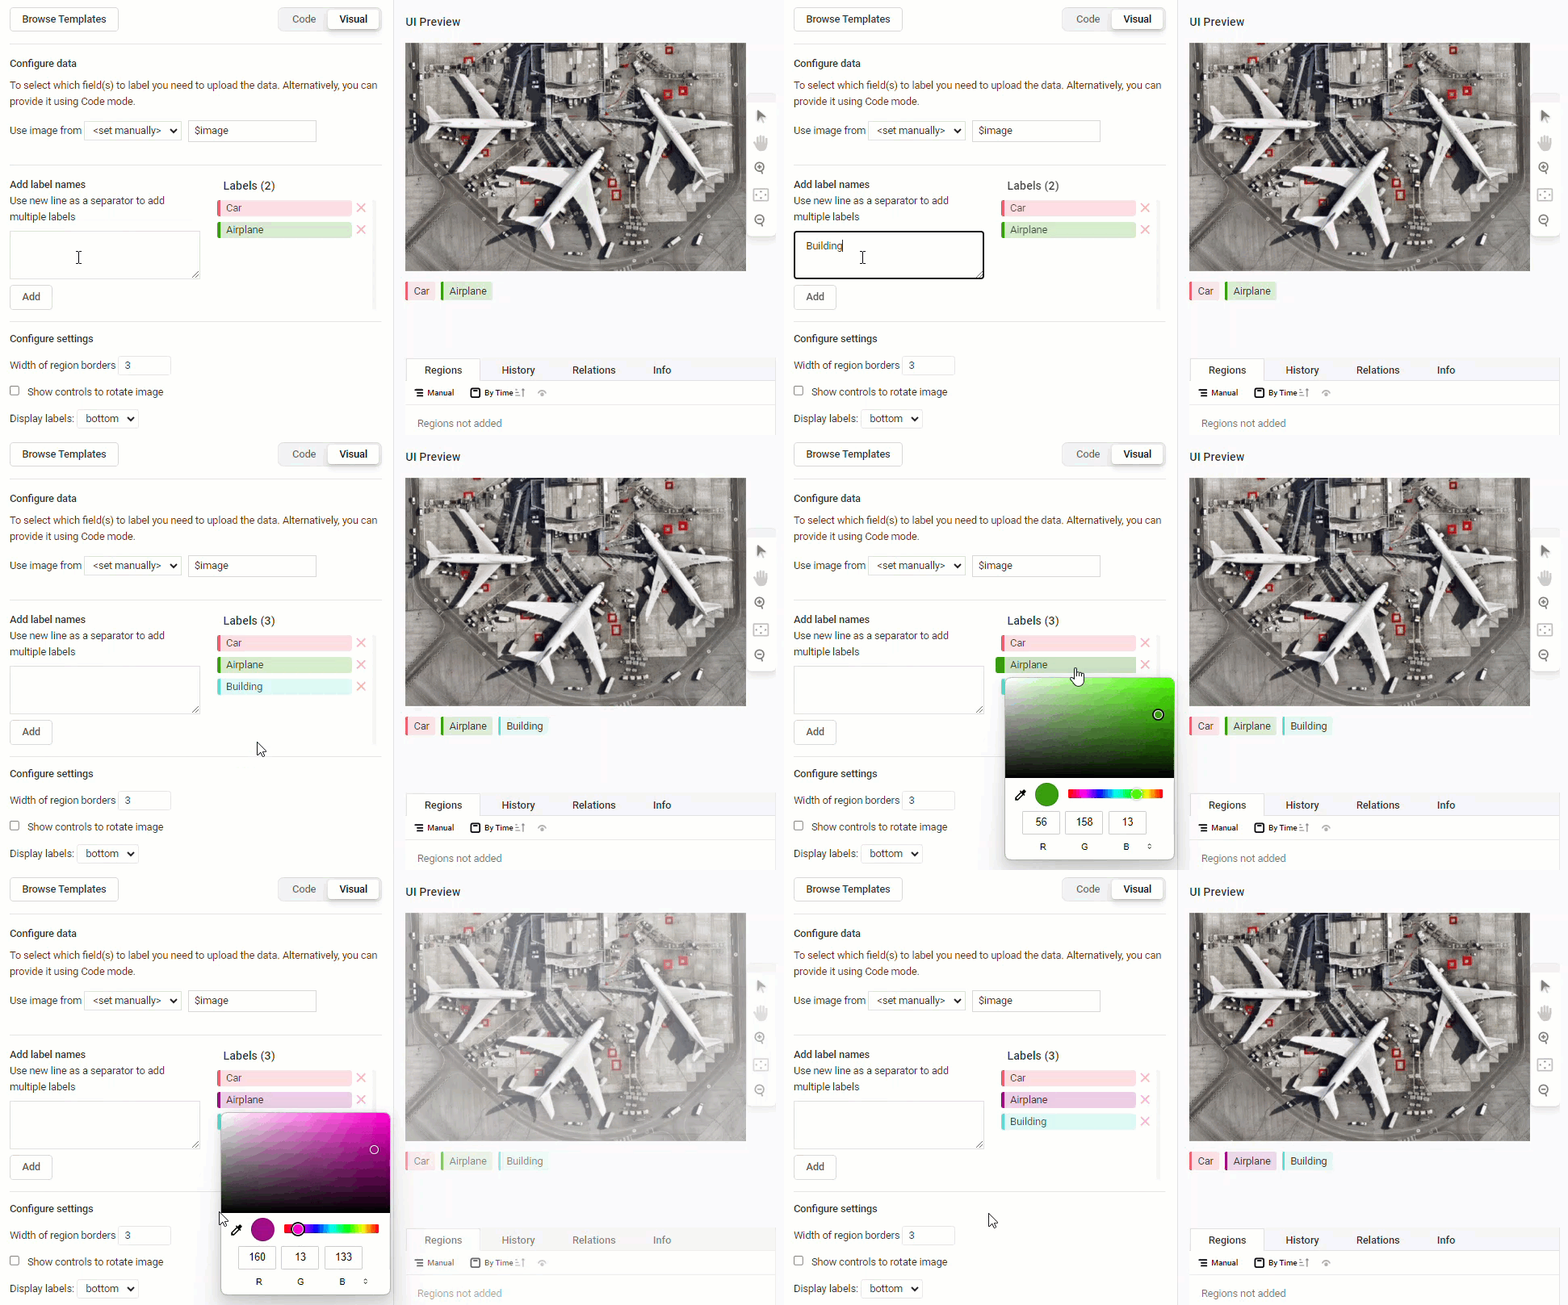
- Add label names on new lines.
- (Optional) Choose new colors for the labels by clicking the label name and choosing a new color using the color selector.
- Configure additional settings relevant to the labeling interface functionality. For example, when labeling text you might have the option to Select text by words.
- Click Save.
note
If you are modifying a project that has in-progress work, note the following:
- You cannot remove labels or change the type of labeling being performed unless you delete any existing annotations that are using those labels.
- If you make changes to the labeling configuration, any tabs that you might have created in the Data Manager are removed.
Label interface editor
The label interface editor has several components:
- Visual view
- Code view
- UI preview
note
The UI preview allows you to preview your configuration with example data provided by Label Studio. If you want to see it work with your task data, you will need to open a task from the Data Manager.
Visual view
The Visual view provides a user-friendly way to set up and configure the labeling interface without writing XML code. It’s particularly useful for users who are not familiar with coding or prefer a more graphical approach to interface configuration.
The options that are available depend on the template you have selected, but generally they are divided into three segments:
- Configure Data
-
Use this to specify the data that you are labeling.
If you have already imported data, you may be able to select different options from the
<set manually>dropdown. Otherwise, this is automatically set to a default variable. - Add label names
- Add choices
-
Depending on whether your configuration is using Labels or Choices, you can use this section to add, remove, and customize the options available to annotators.

- Configure settings
-
This section displays some optional parameters available for certain tags within the configuration.
note
Note that the Visual view does not support all advanced customization options. For that, you will need to switch to the Code view.
Code view
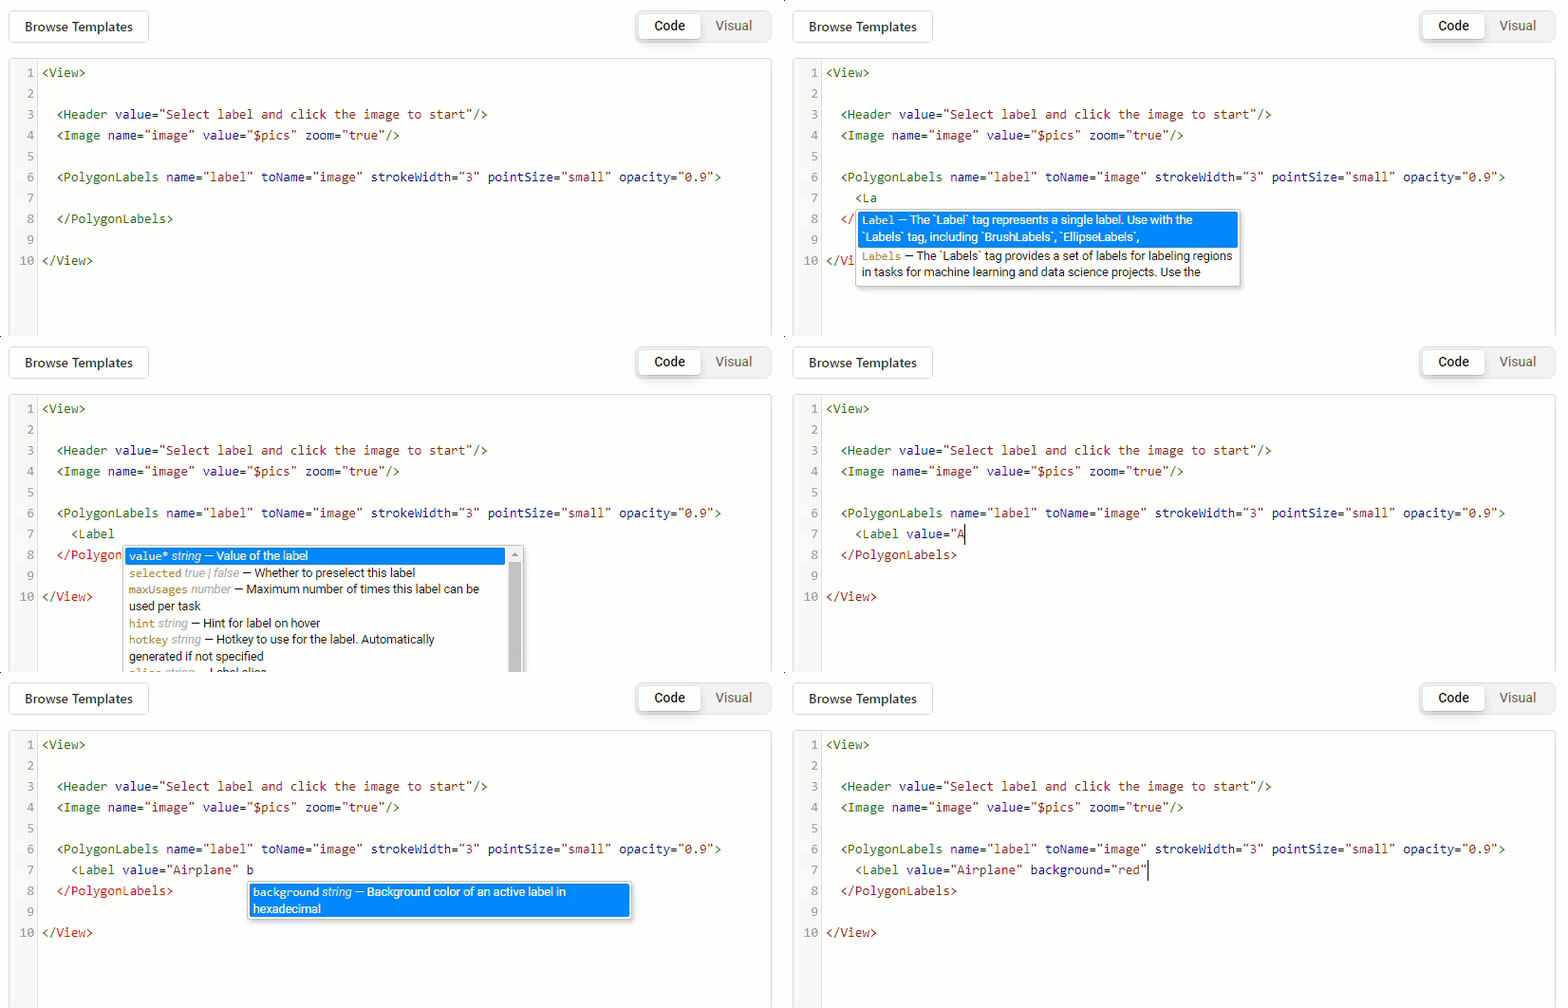
For more precise configuration, you can use the Code view. From here, you can view and edit the labeling configuration in an XML-like structure.
For more information about how to use labeling configuration tags, see Use tags and parameters when customizing the labeling interface.
Code view autocomplete
The code view has an autocomplete helper that appears as you type.
The autocomplete includes prompts for both tags and the parameters that are available for the selected tag:

Tag suggestions appear after you type the opening angle bracket <. Parameter suggestions appear after adding a blank space within the tag.
To accept a suggestion, you can click to select it, or press the Tab key while the suggestion is highlighted.
Add a labeling config from the command line
You can define the labeling configuration in a config.xml file and initialize a specific project in Label Studio with that file.
label-studio my_new_project start --label-config config.xmlAdd a labeling config with the API
You can configure your labeling configuration with the server API. See the Backend API documentation for more details.